
Um Nucleus One zu nutzen, benötigen Sie ein Roon-Konto mit einer gültigen Testversion oder einem Abonnement. Machen Sie sich zunächst mit den folgenden Schritten vertraut und erstellen Sie dann Ihr Konto, indem Sie auf die Schaltfläche "Konto erstellen" am Ende dieser Schnellstartanleitung klicken.
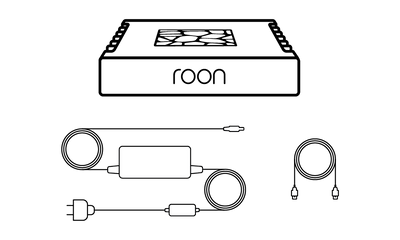
In the box, you'll find everything you need to get going with Nucleus One and Roon. Please take a moment to identify what's included:
● Nucleus One
● Power supply
● AC power cord
● Ethernet cable
Bevor Sie Roon verwenden können, müssen alle Ihre Geräte angeschlossen werden. Nucleus One benötigt eine kabelgebundene Netzwerkverbindung, um Musik auf Ihre Audioprodukte zu streamen, mit Roon-Apps auf Ihren Geräten zu kommunizieren und Informationen und Streaming-Inhalte aus dem Internet abzurufen. Am besten ist es, wenn Ihr Nucleus One - sowie die Geräte, die Sie damit verwenden möchten - angeschlossen und eingeschaltet ist, bevor Sie beginnen.
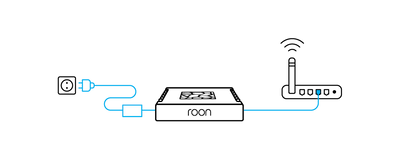
Schließen Sie das Ethernet-Kabel an Ihren Nucleus One an und verbinden Sie es mit Ihrem Router oder Switch.
Verbinden Sie dann das Netzkabel mit dem Netzteil. Schließen Sie das Netzteil an Ihren Nucleus One an, verbinden Sie es mit dem Stromnetz und schalten Sie es mit dem Netzschalter auf der Rückseite des Geräts ein.
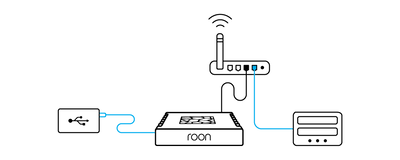
If you have music on a USB hard drive, connect it to one of the USB ports on the Nucleus One.
If you store music files on a NAS (network attached storage) device, make sure it's connected to your network and powered up.
If you prefer to pre-install a hard drive in your Nucleus One, please follow the steps outlined in this guide.

Roon works with USB, HDMI, and networked audio devices. Make sure all your audio products are connected and powered up.
If they're networked devices, be sure to use the apps from the manufacturer to configure and add them on your home network.
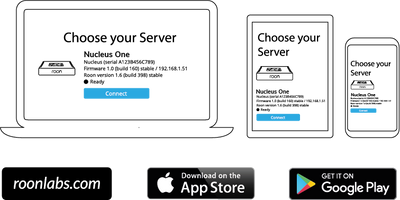
You use apps on your phone, tablet, and computer to set up and control Nucleus One. For Mac and Windows PCs, download the Roon app from our website. For iPhones, iPads, and Android phones and tablets, download the Roon Remote app from the App Store or Google Play.
Once all your devices – Nucleus One, hard drives, NAS, and audio equipment – are connected to your network and powered up, launch Roon or Roon Remote to start using Nucleus One.
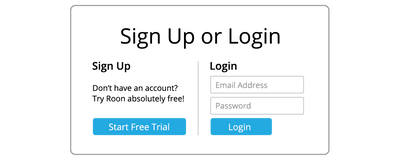
Verbinden Sie sich über die Roon oder Roon Remote App mit Ihrem Nucleus One und melden Sie sich mit der E-Mail-Adresse und dem Passwort für das Roon-Konto an, das Sie in Schritt 1 erstellt haben.
The first time you use your Nucleus One, Roon will take you through several steps to get your system configured. This process usually takes just a few minutes.
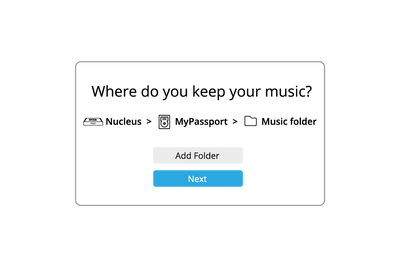
In order to build your personalized music library, Roon needs to locate your music files. These can be on internal storage, external USB hard drives, or stored on a NAS.
You can add as many folders of music files as you like using the app. Roon will never modify your files in any way.

Roon can connect to several streaming services – TIDAL, Qobuz, and KKBOX – to let you add cloud-based music to your library. If you have a streaming account already, add your login details here.
If not, starting a trial with one of the services that works with Roon is a great idea. Access to millions of high-quality streaming titles unlocks many of Roon's best features and helps you discover more music you'll love.
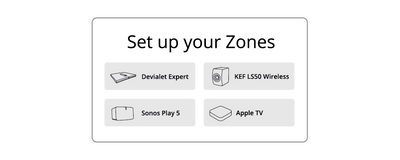
Roon automatically finds the audio devices you connected in Step 3. Choose all the devices you plan to use for listening.
Don't worry if you're uncertain about some of these settings. You can always change them later.